✈️ Flight Price Prediction MLOps Project
This project is a comprehensive, end-to-end MLOps pipeline for predicting flight prices. It leverages a modern stack of data and machine learning tools to build a reproducible, automated, and robust system that covers the entire lifecycle, from data ingestion and validation to model training, explainability, and serving.
✨ Features
- Data & Pipeline Versioning: Uses DVC to version control data, models, and intermediate artifacts, ensuring full reproducibility.
- Declarative Pipeline Orchestration: The entire ML pipeline is defined as code in
dvc.yaml, allowing for robust, dependency-aware execution. - Automated Data Validation: Integrates Great Expectations at each pipeline stage to enforce data quality.
- Experiment Tracking & Model Management: Integrates MLflow for comprehensive experiment tracking, parameter logging, and model registration.
- Automated CI/CD: Implements GitHub Actions for automated linting, testing, pipeline validation, and deployment to Google Cloud.
- Production-Ready API: Includes a high-performance FastAPI server to serve the champion model, containerized with Docker.
- Reproducible Environment: Project dependencies are managed with
uvand locked inuv.lockfor fast, deterministic setups.
🚀 Quickstart: Local Setup
Follow these steps to get the project running on your local machine.
Prerequisites
- Python 3.12+
- uv: An extremely fast Python package installer and resolver.
- Git
- DVC
- act (Optional, for local CI/CD testing)
1. Clone the Repository
git clone https://github.com/dakshvanshaj/flights-price-prediction-mlops.git
cd flights-price-prediction-mlops
2. Create Virtual Environment & Install Dependencies
# Create and activate a virtual environment using uv
uv venv
source .venv/bin/activate
# On Windows: .\.venv\Scripts\activate

# Sync the environment with the lock file for a reproducible setup
uv sync --all-extras --locked

# Install the project in editable mode
uv pip install -e .
3. Get the Project Data
You have two options to get the data needed to run the pipelines.
Option A: Quick Local Start (No Credentials Needed)
This is the fastest way to get started. This project includes a Git-tracked archive with the initial raw data.
# Unzip the archive to get the initial flights.csv
unzip data/archive-git-tracked/raw.zip -d data/raw/
Option B: Full DVC Setup (Recommended)
To get all versioned data, models, and artifacts, you must configure DVC to connect to the remote S3-compatible storage. See the DVC Integration Guide » for more details.
# Configure the DVC remote endpoint URL and credentials.
dvc remote add -d myremote s3://your-bucket-name
dvc remote modify --local myremote endpointurl <YOUR_S3_ENDPOINT_URL>
dvc remote modify --local myremote access_key_id <YOUR_ACCESS_KEY_ID>
dvc remote modify --local myremote secret_access_key <YOUR_SECRET_ACCESS_KEY>

# Pull all DVC-tracked data and model artifacts
dvc pull -v
4. Set Up MLflow Tracking Server (Optional)
By default, MLflow will log experiments locally. To use a remote, centralized server, create a .env file in the project root and populate it with your server's credentials. The application will automatically load these using dotenv.
# .env file
MLFLOW_TRACKING_URI=http://your-remote-mlflow-server-ip:5000
MLFLOW_AWS_ACCESS_KEY_ID=your_mlflow_s3_access_key
MLFLOW_AWS_SECRET_ACCESS_KEY=your_mlflow_s3_secret_key
MLFLOW_AWS_DEFAULT_REGION=your_s3_bucket_region
For a complete guide on deploying a production-grade MLflow server, see the MLflow Deployment Documentation ».
5. Running the Pipelines
You can run the project's pipelines in several ways. See the DVC Pipeline Documentation » for a full breakdown.
Method 1: Automated DAG Execution with DVC (Recommended)
# Run the entire pipeline from start to finish
dvc repro

# Force if it shows no change in pipeline
dvc repro -f

# Or, run the pipeline up to a specific stage
dvc repro gold_pipeline

# Alternatively using experiment tracking
dvc exp run

dvc exp show
Method 2: Manual Script Execution (For Debugging)
Use the CLI shortcuts defined in pyproject.toml:
run-bronze-pipeline train.csv
run-silver-pipeline train.csv
run-gold-pipeline
run-training-pipeline
6. Serving the API and Running the UI
Once the pipelines have been run and a model is trained, you can serve it via a FastAPI application and interact with it through a Streamlit UI.
Step 1: Run the Prediction Server
You have two options to run the server.
Option A: Run with Docker (Recommended)
The project is configured to run the prediction server in a Docker container. This is the recommended approach for a production-like environment.
- Build the image:
bash docker build -t prediction-server:latest -f src/prediction_server/Dockerfile . - Run the container:
Create a
prediction_app.envfile insrc/prediction_server/with your credentials (seedocs/MLOps/mlflow.mdfor details) and run:bash docker run --env-file ./src/prediction_server/prediction_app.env -p 9000:9000 prediction-server:latest
Option B: Run Locally with Uvicorn
For quick testing and development, you can run the server directly with uvicorn.
uvicorn src.prediction_server.main:app --host 0.0.0.0 --port 9000
The API documentation will be available at http://localhost:9000/docs.
Step 2: Run the User Interface
This project includes an interactive web application built with Streamlit.
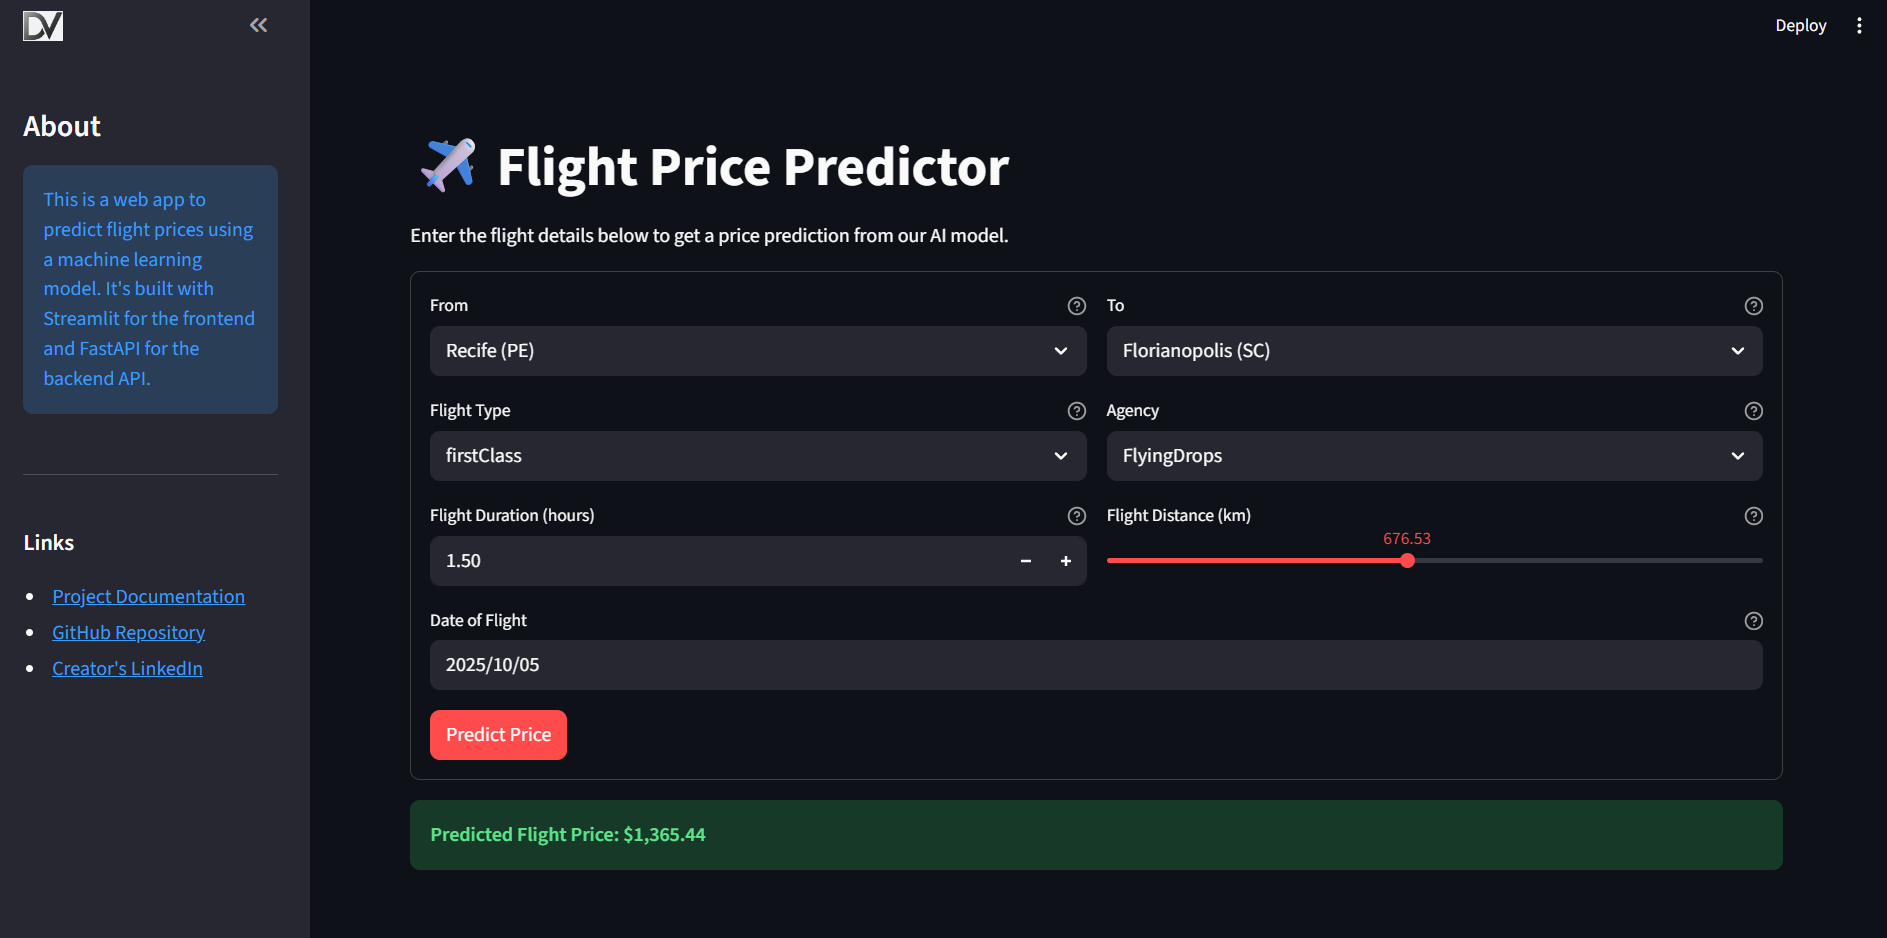
To run it locally:
- Ensure the API is running using one of the methods described above.
- Configure the API URL by creating a
.envfile in thefrontend_streamlit/directory.ini # frontend_streamlit/.env API_URL=http://127.0.0.1:9000/prediction - Run the Streamlit app from the project root:
bash
    streamlit run frontend_streamlit/app.py
For more details, see the Frontend Documentation.
🔧 Configuring the Pipelines
The behavior of the pipelines can be customized without changing the source code.
- High-Level Parameters (
params.yaml): Control the overall strategy, such as which model to run (model_config_to_run) or whether to use the tree-based preprocessing path (is_tree_model). - Low-Level Configuration (
src/shared/config/): Contains static configurations like file paths and column lists for transformations.
🤖 Local CI/CD Testing with act
You can run the GitHub Actions workflows locally using act. This is incredibly useful for testing changes to your CI/CD pipeline without pushing to GitHub. See the CI and CD docs for more details.
Setup
Create a .secrets file in the project root and populate it with the necessary credentials for local testing.
Warning: The
.secretsfile contains sensitive information. It is already listed in.gitignoreand should never be committed to version control.
Usage
# Run the default `on: push` workflow
act

# Run a specific job from a workflow
act -j test_and_lint

# Run the CD workflow by simulating a tag push
act push -W .github/workflows/cd.yml -e tag_push_event.json
📚 Full Project Documentation
This project is documented using MkDocs. To view the full, searchable documentation site locally, run:
mkdocs serve
Navigate to http://127.0.0.1:8000 in your browser.